Vista Mail Server: Basic Admin Tasks
Entering the Admin Interface
- Using a web browser go to http://mail.yourdomain.com:8010/. For example, if your domain name was acme.com you would go to http://mail.acme.com:8010/
- Click on Enter to go to the admin interface. When prompted, enter postmaster as your username and enter the password supplied to you as the password.
- Once you've correctly entered a username and password you should be at the main accounts page - as shown below. Scroll down for instructions on performing basic tasks such as adding and deleting users.
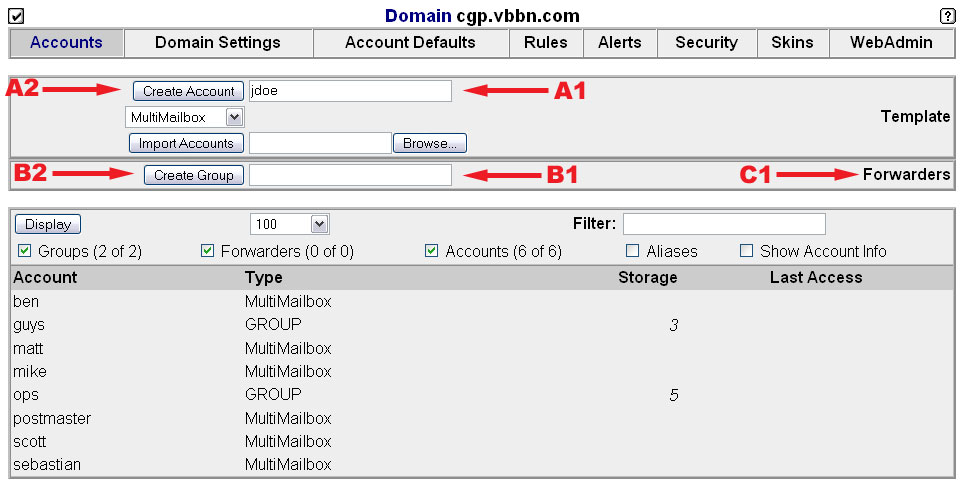
Accounts Page
Adding an account
- Type the username for the account (the part you want to the left of the @ in the persons email address) into the box marked by arrow A1.
- Click the Create Account button, marked by arrow A2. This will to take you to the account settings page where you can set options, including the password, for an account.
- Click here to go to instructions for the account settings page.
Deleting an account
- Click on the account you want to delete, then proceed to the account settings page for further instructions.
Renaming an account
- Click on the account you want to delete, then proceed to the account settings page for further instructions.
Creating a group
A group is an email address that allows mail to be sent to multiple recipients through a single address. For example; you could set up a group called sales and add all your salespeople to the group. When email is sent to sales@yourdomain.com all your salespeople will receive the message.
- Type the name of the group you want to create in the box marked by arrow B1.
- Then click on the Create Group button marked by arrow B2. This will take you to the Group Setting page.
- Click here to go to instructions for the Group Settings page.
Adding a forwarder
A forwarder is an address that you want to forward directly on to another address, forwarders are generally used for addresses where someone will never need to log in to your mail server.
- Click on the Forwarders link marked by arrow C1. This will take you to the Forwarders page.
- Click here to go to instructions for the Forwarders page.