Vista Mail Server: Groups
Group Settings Page
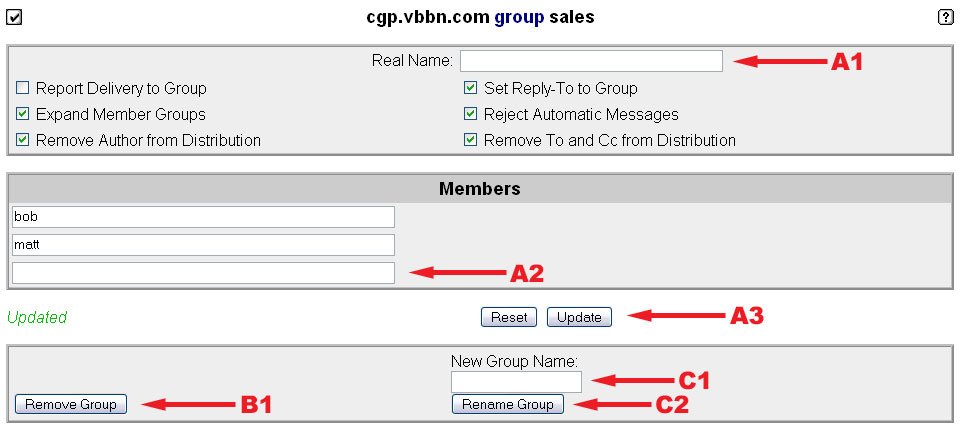
Initial Set-up for a new group
- Type a description of the group into the Real Name box marked by arrow A1. This field is used as the From name in emails sent from the group.
- Add users to the group by typing their email addresses into the box marked by arrow A2. You can either type addresses one at a time, hitting the update button marked by arrow A3 after each address, or you can type multiple addresses seperated by commas and just hit update once.
- Always click the update button marked by arrow A3 after making any changes. Your changes aren't saved unless you do this.
Removing a group
- Click on Remove Group button marked by arrow B1. You will be promtped to verify that you want to remove the group.
Renaming a group
- Type the new name for the group in the box marked by arrow C1.
- Then click the Rename Group button marked by arrow C2.
Return to the Accounts Page